
Thursday, May 8, 2014
Some sprinkles, pink icing and TLC.
Some TLC from my Sarah. I found a rose, note and an iced bun in my kitchen this morning from my daughter. I've had a cold this week. Anything pink with sprinkles has to put a smile on your face. Thank you my darling Sarah. Feeling loved. Xxx
Saturday, February 26, 2011
Muesli Florentines

I awoke this morning to the sound of rain on my roof - my plans for going to the local Air Show melted like icecream on a hot day. A basket of ironing sat in the corner begging for attention. Meh! Instead I decided to make a tempting treat to take to the hospital for my Mum who has totally lost her appetite. After years of experience enticing small children to eat all kinds of healthy foods I'm back to that stage with an elderly parent. Mum was always fond of Muesli for breakfast and I found a delicious and nutritious recipe on our favourite bircher muesli packet. I deviated a little from the original in that I made individual florentines and kept them a little healthier by only using a small amount of chocolate on top rather than a whole layer. Yes, you still get that little choc-a-holic 'high' but without the zillion kilojoules.
The bircher museli we eat is full of wholegrain oats with 40% mixed fruit, seeds and nuts (and only 5g of fat per 100g). I'm sure there are similar products in your supermarket. I love the mix of sultanas, dates, currants, apple, papaya, apricots and hazlenuts. They add colour to the Florentines too.
Muesli Florentines
1/2 cup Brown Sugar
2 Eggs
3 tbs Golden Syrup
3 tbs Margarine
1 tsp Baking Powder
3 Cups Swiss Bircher Muesli
Cooking Chocolate

Method
1. Preheat oven to 160 degrees (fan forced oven). Grease and line a baking tray.
2. Place brown sugar, eggs, golden syrup and margarine into a mixing bowl and using a wooden spoon, mix all ingredients until combined.

3. Add baking powder and muesli and mix with a wooden spoon until well combined.
4. Place tablespoons of florentine mixture onto baking tray. Shape into rounds and slightly flatten.
Florentines can be as small or large as you prefer.
5. Cook for 20-25 minutes - watch closely as ovens vary. Cool6. Put choc pieces into a microwaveable bowl and microwave until melted. (Check every 30 seconds to see if chocolate is the right consistency).
 | |
| Florentines with just a hint of chocolate...mmmmmmm! |
With a name like 'Florentines' you'd expect them to have been invented in Florence however legend has it that they originated in Paris. Wherever doesn't matter...these delicious treats are so easy to prepare and so delicious to devour - I guarantee they won't last long.
Keep smiling...
Annie xxx
More food images at http://www.flickr.com/photos/annmaxine
Monday, February 14, 2011
Recipe: Asian Chickpea Rice Salad - The Cookbook Challenge Week 3
It's been one of those tough weeks with my dear old Mum really ill in hospital. Not a lot of time for browsing the cookbooks. Food this week had to be stress-free, fast and healthy!
I'd picked up a promotional cookbook in the supermarket sometime last year called 'Food Heart Life' produced by the Unilever company. It actually contains some delicious (and healthy) recipes.

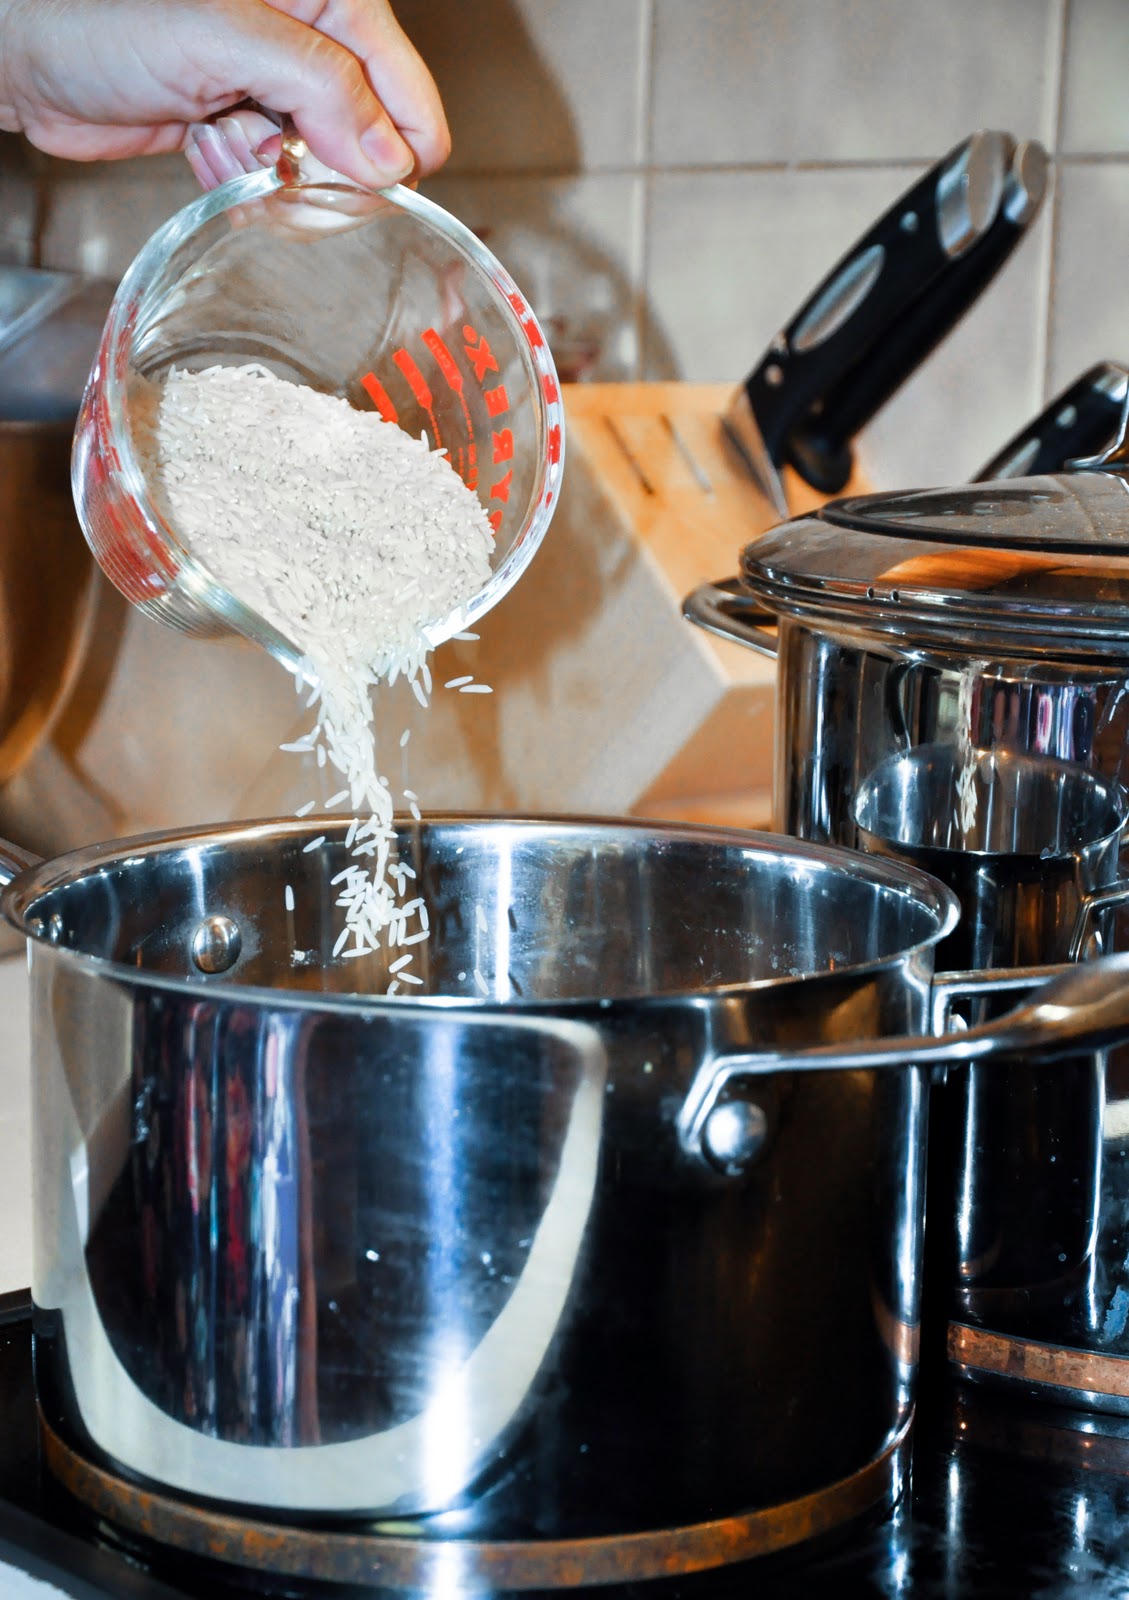
I decided to try a rice salad with a difference for this fortnight's challenge: Rice or Noodles. I'm going to prepare it in the future. A lovely combination of stir-fried onion, red capsicum, mushrooms and ginger added to rice, chickpeas and coriander. A delicate sauce of lime, sweet chilli and mint stirred through gives it a beautiful Asian flavour.
ASIAN CHICKPEA RICE SALAD
1/2 cup white long grain rice
400g can chickpeas
40g (2 tablespoons) margarine (or oil)
1 large brown onion, sliced
1 large red capsicum, chopped
4 flat mushrooms, sliced at the last minute
1 tablespoon finely chopped ginger
1 cup chopped coriander
3 tablespoons sweet chilli sauce
1/2 cup lime juice
1/4 cup finely shredded mint
Lime wedges to serve

Cook rice according to packet. Drain well.

Drain and rinse chickpeas. Heat marg/oil in a non-stick wok over a high heat and stir-fry onion and capsicum for 2 minutes. Add mushrooms and stir-fry for a further 2 minutes. Add ginger and stir-fry for another 2-3 minutes until the vegetables are cooked. Remove from the heat and stir in the coriander.

To create dressing, combine sweet chilli sauce, lime juice and mint.
To serve, mix together the rice, chickpeas, vegetables and dressing before you serve, garnish with lime wedges.

PS. You can make half the quantity of dressing if preferred, it still tastes great!
Hope you all had a beautiful Valentines Day.
Until next time,
Happy cooking!
Annie x

Sunday, February 6, 2011
Recipe: Orange Sweet Potato and Ditalini Patties

With temps soaring here in Australia, especially in the kitchen, Fast Food (Murdoch Books) - Quick and easy everyday ideas for cooks in a hurry seemed like a good source for a quick meal on a hot day. This book is described as:
'Tailored to help the home cook find a little breathing space in a hectic day, each of the 175 recipes in Fast Food is designed to create a mouthwatering meal with minimum time in the kitchen, leaving you more time to spend on the important things in life. This chunky, comprehensive recipe book features a wealth of simple, clearly-explained and illustrated recipes from around the world.'

The recipe calls for Ditalini pasta - a small Italian tubular pasta cut so the diameter is roughly the same as the width. I substituted a small macaroni I had in the pantry and it worked well although Ditalini would be more aesthetically pleasing. The pasta should be cooked 'al dente' or 'to the tooth' which means that it is not so hard that the pasta is raw inside, nor so soft that it lacks firmness when eaten. I remember an Australian chef defining 'al dente' as "Just don't cook the crap out of it". I think that just about covers it.
 |
Orange Sweet Potato and Ditalini Patties
Ingredients
2 orange sweet potatoes (about 800g)
1/2 cup ditalini (I used tiny macaroni)
30g toasted pine nuts
2 cloves garlic, crushed
4 tablespoons finely chopped fresh basil
1/2 cup (50g) grated parmesan
1/3 cup (35g dry breadcrumbs
plain flour, for dusting
olive oil, for shallow-frying

Method
Prehead the oven to very hot 250 C (500 F). Pierce the whole orange sweet potatoes several times with a fork, then place in a roasting tin and roast for 1 hour, or until soft. Remove and allow to cool. Meanwhle, cook the pasta in a large saucepan of rapidly boiling salted water until aldente. Drain and rinse under running water.

Peel the sweet potato and mash the flesh with a potato masher or fork, then add the pine nuts, garlic, basil, Parmesan, breadcrumbs and the pasta and combine. Season.

Shape the mixture into eight even patties (about 1.5cm thick) with floured hands, then lightly dust the patties with flour. Heat the oil in a large frying pan and cook the patties in batches over medium heat for 2 minutes each side, or until golden and heated through. Drain on crumpled paper towels, sprinkle with salt and serve immediately with a fresh green salad.
Serve 4

Note: Roasting the pumpkin is the most time-consuming part of this recipe and you don't need to be in the kitchen the whole time they are cooking. The rest is easy!
Until next time,
Annie x
Click here for more of my images.
Until next time,
Annie x
Click here for more of my images.
Monday, January 31, 2011
Gourmet brekky in a flash!
I woke this morning and just couldn't face the thought of yet another breakfast of 2 weetbix - you know - New Year's Resolution for a healthy 2011 and all that 'stuff'. TBG had just walked in with fresh loaves of bread from the bakery and the aroma filled the house.
"Do you want tomato on toast?" he asked. Perhaps...but MY version.
I thought of a fast and easy bruschetta, and this IS fast. Probably not quite as delicious as when the bread is prepared on a brustolina grill but hey! I did promise it was fast.
Just the mention of tomatoes and basil bring memories of summer and Italy. The sweet perfume of vine ripened tomatoes also takes me back to childhood and being sent out into the garden to choose the ripest ones for dinner.
So here is my recipe for a fast and easy gourmet brekky that will have you walking into the office with a smile on your face!
Bruschetta in a Flash
2 slices of bread (sourdough, pana casa, foccacia or what's at hand!)
1 vine-ripened tomato (finely diced)
1/4 small red onion (finely diced)
fresh basil leaves (shredded)
Garlic-infused Virgin Olive Oil (or plain)
Balsamic Glaze
Sea Salt
Ground Pepper


Toast 2 slices of bread - sourdough works beautifully.
With a pastry brush dipped in the olive oil, lightly brush over the warm toast. I don't think the brush even came into contact with the toast which made me feel even better about my NY resolution! I used a lovely garlic infused oil from Fuch's - an Australian company from the Hunter region that produces delicious oils & vinegars - use caution when saying the name. (Check out their beautiful products and recipes).
Next, place the finely diced tomatoes and red onion on the toast and top with the shredded fresh basil.
Finish with a dusting of pepper, a little Maldon sea salt and a touch of Mazzetti Balsamic Glaze.

Yes, I'm smiling.

Tell me...do you have a fast and delicious breakfast recipe to share?
Have a beautiful day!
Love
Annie x
Saturday, January 29, 2011
Recipe: Meringue-Encrusted Lemon Cakes - The Cookbook Challenge Week 2
The theme for this fortnight's challenge was 'lemon'.


 Until next time, enjoy!
For more images visit Ann McLeod Photography


 |
| My lemon reamer |
When I was a child it was common to eat dessert after the evening meal. My Mum would bake custards, rice puddings, stewed fruit or simply jelly & ice cream. By the time I had my own babies in the 80s, we were far more health conscious and much to my Mother's concern, dessert had become a treat, not an every day occurence. "But what are you giving the children for dessert?"
Dessert, in our household at least, is still something enjoyed only occasionally after a celebratory lunch or dinner so I like it to be rather special.
 |
| My eldest daughter 'taste-testing' |
Lemons with their tangy flavour, sweet fragrance and beautiful colour lend themselves to desserts. I found a luscious, lemony recipe in a book my eldest daughter (pictured above) gave me last year called 'Seasons' by Australian cookbook author, Donna Hay. The book is a collection of recipes from Donna's bi-monthly cooking magazine. Divided into Seasons and then into Sweet and Savoury recipes, the book provides not only inspirational, seasonal food but also a feast for the eye with stunning food photography. Just browsing the pages evokes those feelings of summer, winter, autumn and spring. From the book...
"Summer means sand
between your toes,
endless days with not much
to do and all day to do it in
and the promise of buckets of fresh,
sparkling flavours
cooked simply at
day's end."
 |
| Seasons by Donna Hay |
So, back to my entry for this fortnight's Cookbook Challenge...
Some of you may remember that spectacular dessert, Bombe Alaska - a flaming white mountain of meringue snow blanketing a layer of cake and ice-cream. They were first produced in 1876 in New York to celebrate the newly acquired territory of Alaska. A French chef, Jean Giroix, popularized the dessert worldwide a decade later.
Some of you may remember that spectacular dessert, Bombe Alaska - a flaming white mountain of meringue snow blanketing a layer of cake and ice-cream. They were first produced in 1876 in New York to celebrate the newly acquired territory of Alaska. A French chef, Jean Giroix, popularized the dessert worldwide a decade later.
The recipe I've chosen is a variation of the Bombe with a lemon twist that Donna Hay calls 'Meringue-Encrusted Lemon Cakes'. They're basically individual lemon cakes topped with a scoop of ice-cream, covered in meringue and browned quickly under the grill, the meringue acting as an insulator to keep the ice-cream firm. Not only decadent and delicious but also quite beautiful to present to your guests.

Meringue-Encased Lemon cakes
Ingredients
Cakes
125 butter, softened
1 cup (220g) caster (superfine) sugar
1/4 cup finely grated lemon rind
2 eggs
1 1/2 cups (225g) plain (all-purpose) flour, sifted
1 1/2 teaspoons baking powder, sifted
1 1/2 teaspoons baking powder, sifted
1/3 cup (80ml) milk
2 tablespoons lemon juice
6 scoops good quality vanilla ice-cream
Meringue
150g egg whites (approximately 4 eggs)
1 cup (220g) caster (superfine) sugar
1 teaspoon white vinegar
Method
Cakes
Preheat the oven to 160 C (320 F). Place the butter, sugar and lemon rind in the bowl of an electric mixer and beat until light and creamy. Gradually add the eggs and beat well. Fold in the flour, baking powder, milk and lemon juice. Spoon the mixture into 6 x 1 cup-capacity (250ml) lightly greased muffin tins (I used bundt tins) and bake for 30 minutes or until cooked when tested with a skewer. Cool in the tins for 5 minutes. Remove and cool on a wire rack.
 |
| 1-cup capacity bundt tins worked well for this recipe |
Using a tablespoon, scoop out a hole in the top of each cake - if using bundt tins, there is already a hollow in the top of the cake. Fill the hole or hollow with a scoop of ice-cream. Place the cakes on a tray and freeze for 30 minutes.

Spread the basic meringue mixture over the cakes and place on a baking tray. Cook under a preheated hot grill (my choice) or in a preheated 200 C (350 F) oven for 2-3 minutes or until the meringue is set and golden. Serve immediately. Makes 6.


Meringue
Place the egg whites in the bowl of an electric mixer and beat until stiff peaks form. Gradually add the sugar and vinegar and beat until the mixture is thick and glossy. Use immediately.

Love,
Annie x
For more images visit Ann McLeod Photography

Sunday, January 16, 2011
Recipe: Spiced Peaches - The Cookbook Challenge Week 1
Theme: Stone fruits

Cookbook: The Margaret Fulton Cookery Course - Part 28 - circa 1970s

I came across the Cookbook Challenge late last year and thought what a great opportunity to explore new recipes, hone my food photography skills and revisit the hundreds of cookbooks I've been collecting throughout my life.
I come from a line of cooks - my mother earned her living as a cook, my grandmother also and whilst they were never professionally trained, the food they served was always inspirational. It was through watching both these women cook when I was a child that I developed my own love of cooking. Combine that with a passion for photography and the Cookbook Challenge seemed like fun - 26 recipes on a theme over 52 weeks - cooked, photographed and blogged.
The challenge for Week 1 was 'Stone Fruit'. Peaches are my favourite fruit with their beautiful golden flesh, velvety skin and their sweet perfume alone reminds me of summer.
My recipe comes from a set of cookbooks I was given as a child in the late 60s or early 70s. The matriarch of Australian cooking, Margaret Fulton published a weekly cookery course and I'd spend hours looking at the beautiful images and reading the recipes and information.
40 years later these recipes still delight those who try them.

Spiced Peaches
4 large yellow peaches
4 tablespoons brown sugar
cinnamon
nutmeg
16 whole cloves
45 grams (1 1/2 oz) butter (I used much less with good results)
The recipe suggests: "Delicious as a dessert or a welcome substitute for vegetables, with hot ham or duck".
Method
Pour boiling water over the peaches, allow to stand for 3 minutes and then skin, halve and stone them.
 | ||
| Marg Fulton still teaches me today - I had no idea how easy it is to peel peaches using this method! |

Arrange in an ovenproof dish, sprinkle with the brown sugar and a little cinnamon and nutmeg.

Pierce each peach half with 2 cloves. Cut butter into small pieces, scatter over peaches, slip under the grill for 5 minutes or until heated through.
Voila!

This is an old fashioned recipe that put a smile on the faces of my family. By cutting down on the butter it appeased those who are sticking to their health regime. If wanting to be a little indulgent the peaches would be extra delicious with vanilla ice-cream, custard or a dollop of cream.
I just wish someone would invent aroma-net - the perfume of cinnamon, cloves and peaches was ... sigh!
What's your favourite stone fruit?
The challenge for Week 2? Citrus
The challenge for Week 2? Citrus
Cooked with love,
Annie x
http://www.flickr.com/photos.annmaxine
Tuesday, January 11, 2011
The Magic of Mushrooms.
After a week by myself (except for the dog, 2 cats and 2 chickens) my family has started to arrive home from their holidays. Today No. 4 flew in from a wonderful week in Adelaide. Tomorrow No. 3 and TBG fly in from Hong Kong. No 3. has been backpacking around Europe for the past 2 months. It'll be wonderful to see her again. There'll be lots of excited stories around the dinner table tomorrow night.
Over the past week, with only one to cook for, I thought I'd be tempted to just have lazy dinners like vegemite on toast however I found myself still cooking decent, no-fuss meals.
Over the past week, with only one to cook for, I thought I'd be tempted to just have lazy dinners like vegemite on toast however I found myself still cooking decent, no-fuss meals.
 |
| Mushroom Pasta Sauce |
I thought I’d share this simple recipe as it’s a healthy and delicious meal that requires minimal time from you in the kitchen - ideal after a long day at work. The mushrooms I'd bought at the food festival on Saturday were the inspiration for the choice of meal. Mine is a vegetarian version however for the meat-eaters in your life, you can easily brown some mince with a little garlic in a pan and then stir in the cooked sauce and let it simmer for a short while before pouring over your pasta.
 |
| The beautiful mushrooms from Termeil |
Mushroom pasta sauce (it’s really a casserole).
Ingredients:
350g mushrooms
425g can peeled tomatoes, chopped
(I used Ardmona Rich & Thick Chopped Tomatoes with basil & garlic)
1 medium onion, sliced
1 tablespoon olive oil (or less for oiling the casserole dish)
1 tablespoon chopped parsley
Pepper & salt to taste.
Method:
Lightly oil a casserole dish.
Alternate layers of ingredients.
Cover and cook in a 180 degrees oven for 20-30 minutes.
I topped mine with a tiny bit of shaved parmesan.
Delicious and quite healthy (but be sparing with the oil and parmesan.)
Did I enjoy my week Home Alone? A week was enough. I'm used to a busy household. There's nothing better than the smiles and banter of family. xxx
Did I enjoy my week Home Alone? A week was enough. I'm used to a busy household. There's nothing better than the smiles and banter of family. xxx
Saturday, January 1, 2011
Strawberry Smoothie and a Cherry Oven Pancake
The Christmas/New Year period often means that your fridge is bursting with food of every description as you deal with numerous guests, special celebrations and an abundance of scrumptious summer (or winter) fruit and vegetables. Often we tend to 'bite off more than we can chew' if you know what I mean and fruit and veg become a little too sad to present in their raw form.
My New Year's Resolution for 2011 (well, apart from the perennial 'must become healthier') is to continue my journey towards a sustainable environment and part of that means taking only what I need. Our grandparents lived a simple life and 'wastefulness' was not in their vocabulary. So as I went through my fridge, rather than simply 'throwing out' the food that wasn't as pretty as it was when I purchased it, I decided to turn it into something that would once again please the mouths I feed.
I should point out that I don't mean using produce that has developed a green furry coating! Just when the strawberries or cherries lose that shiny gloss or the mushrooms and bananas become a little brown.
So I decided to kick-start my day with a healthy strawberry smoothie. No dear, not a strawberry daiquiri which is more suited to the END of the day.
Smoothies are not only nutritious (generally speaking) but also a fast, delicious and easy brekky for those in a rush.
Strawberry Smoothie
 |
| Strawberries - not quite as plump and shiny as they were a few days ago but still quite edible |
Ingredients
6 Strawberries
1/2 cup of low fat yogurt
1 cup of low fat milk
Method:
Blend all ingredients in a food processor/blender and there you have a delicious, fresh smoothie.
* For my taste, I wanted it a little sweeter so I added a couple of fresh chunks of pineapple I'd cut the previous day and a little of the juice however you can add banana or other fruit. You could also try a tiny drizzle of honey.
 |
| My strawberry smoothie - delicious & satisfing Cherry Oven Pancake |
Back to the fridge and the remaining cherries that TBG bought a few days ago on special are also beginning to look like they need to be eaten NOW! I'd just read one of my favourite food blogs, Not Quite Nigella, and the author Lorraine had cooked a delicious Rhubarb and Cherry Oven Pancake. It sounded intriguing and looked like a great way to use the last of the cherries. I was not disappointed in my cherry version.
It's a very simple recipe and the texture reminded me a little of my mother's baked custards that we'd eat after the Sunday roast when I was growing up. I'm sure it would taste even more delicious with a dash of cream and a drizzle of maple syrup as Lorraine suggests however in sticking to my New Year's Resolution, it was still a treat without the added kilojoules.
For the recipe, visit Lorraine's blog Not Quite Nigella
 |
| My Cherry Oven Pancake |
Wishing you all a happy New Year!
Enjoy...
Love Annie
Tuesday, December 14, 2010
Girdlebuster Pie or Coffee Ice Cream & Butterscotch Pie
 |
| Girdlebuster Pie |
Whenever I think of Christmas I always think of children and the magic that surrounds this special time of year. Perhaps it’s my own childhood memories - those warm summer nights, nativity plays at school, the sound of cicadas, the anticipation of Christmas stockings and I swear once I heard sleigh bells in the middle of the night. I was 35 at the time so I know it was real and you can’t tell me any different…so there!
Christmas is also about family. Next weekend we have TBG’s family coming for lunch – I’m guessing around 30. It’s always good fun and every year there’s a new baby – 2010 is no exception. With only 5 days to go I thought it time to start cooking so today I commenced with a very special dessert that has absolutely NOTHING to do with kids.
I was watching Nigella’s Christmas Special the other week and I saw her prepare this amazingly decadent dessert. Seeing that this is the season of over-indulging, I thought…why not! The name of the dessert is a warning in itself:
GIRDLEBUSTER PIE
Whilst this is a very appropriate name I don’t think it really does this scrumptious pie justice so I’m renaming it ‘Coffee Ice Cream & Butterscotch Pie’.
 |
| I used a delicious coffee ice cream flavoured with Grand Marnier and choc coated coffee beans & almonds |
It’s basically a delicious pie crust containing chunks of milk & dark chocolate, layered with coffee ice cream and topped with a heavenly butterscotch sauce laced with bourbon. Sorry kids, Auntie Ann will do something special for you but this one is definitely a dessert for grown ups!
 |
 |
This is one of the most popular versions of the Girdlebuster:
Base:
375g digestive biscuits (I used McVities from England available in Woolies)
100g chocolate pieces (dark or light or both)
75g softened unsalted butter
Filling:
1 litre tub of coffee ice cream
Butterscotch Topping:
300g golden syrup
100g light muscovado sugar
¼ teaspoon Maldon salt or pinch of table salt
75g unsalted butter
30ml tablespoons bourbon
125ml double cream
Method:
In a food processor, whizz the biscuits, chocolate and butter until it resembles damp sand. Carefully press crumbs evenly over the base and sides of a pie dish. Place in the freezer for an hour to harden.
In the meantime, take your ice cream from the freezer and pop it into the fridge to soften SLIGHTLY. This doesn’t take long. Once softened, spread over the biscuit base and return your pie to the freezer.
In the meantime, take your ice cream from the freezer and pop it into the fridge to soften SLIGHTLY. This doesn’t take long. Once softened, spread over the biscuit base and return your pie to the freezer.
 |
This pie keeps in the freezer for 6 months if wrapped in cling wrap then foil.
Whilst the old guy with the white beard is sorting out who’s been naughty and who’s been nice, this dessert definitely falls into both categories,
NAUGHTY & NICE
Enjoy!
 |
| Naughty but Nice |
Subscribe to:
Posts (Atom)